Read the Clues Your Bake Left Behind: A Baker's Guide to Diagnosing What Went Wrong
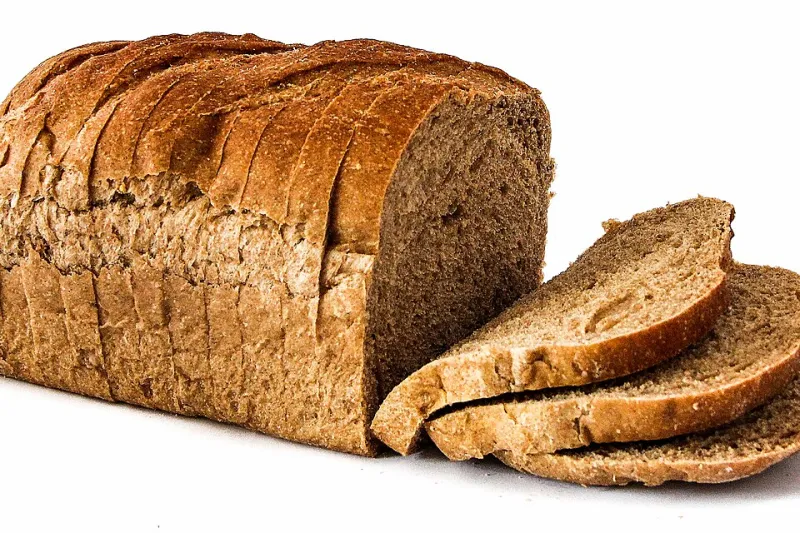
Photo: FranHogan, CC BY-SA 4.0, via Wikimedia Commons
Something went wrong. The cake sank in the middle. The cookies spread into thin, lacy puddles. The bread has a gummy, dense crumb that sticks to the knife. Your first instinct might be to toss the recipe and start fresh, or worse, to assume you're just not cut out for this.
But here's a better instinct: slow down and look at what you've got.
Failed bakes are not random. Every visible symptom — every crack, every sunken layer, every tough crust — is a physical record of something that happened in your oven, your bowl, or your prep. If you know how to read those clues, you don't have to guess. You can diagnose the problem with real precision and fix exactly what needs fixing.
Think of it as forensic baking.
Start With the Outside: What the Surface Is Telling You
Before you cut into anything, look at the exterior. The surface of a bake reflects the early stages of the process — what was happening in the oven's heat environment and how your batter or dough responded to it.
Cracked top on a cake or quick bread: A crack running down the center is actually normal and desirable on things like pound cakes and banana bread. It means the outside set while the inside was still expanding — that's good. But if the cracks are jagged, multiple, or spreading sideways, your oven was likely too hot. The exterior set before the interior had time to rise properly, forcing the expansion to break through wherever it could.
Burnt edges, pale center: Classic hot spot or too-high temperature. If the edges of your cookies or cake are dark while the middle looks underdone, your oven's heat isn't distributing evenly — or the temperature is running hotter than the dial says. An inexpensive oven thermometer will tell you the truth fast.
Flat, spread-out cookies: This one has several possible causes, but the most common are butter that was too warm, too little flour, or not enough chill time for the dough. If your cookies are spreading into thin sheets, the fat melted before the structure had time to set. Chilling the dough for at least 30 minutes before baking is often the simplest fix.
Cut It Open: Reading the Crumb
The interior of a bake — what bakers call the crumb — is where the real story lives. Slice your bake cleanly and take a good look before you take a bite.
Dense, tight crumb in bread: Underproofed dough is the most common culprit. If your bread didn't get enough time to ferment and rise, the gluten structure is too tight and the gas bubbles too small, resulting in a heavy, compact interior. Check whether your dough doubled in size before baking — if it didn't, give it more time next round, especially in a cool kitchen.
Gummy, wet crumb that sticks to the knife: This is an underbaking issue, but it can also signal that the bread was cut too soon. Bread continues to cook internally as it cools — slicing into a hot loaf releases steam that should be redistributing through the crumb, leaving you with that gluey texture. Let your bread cool completely, at least an hour for a standard loaf, before cutting.
Large, irregular holes in bread alongside dense patches: This is overproofing. The dough rose too long, the gluten structure weakened, and the gas bubbles merged into large pockets while collapsing elsewhere. The fix is to reduce proofing time or move the dough to a cooler spot.
Tunnels running through muffins or quick breads: Overmixing. When you stir too aggressively after adding the flour, gluten develops and gas escapes in channels rather than distributing evenly. Quick bread batters should be mixed until just combined — lumpy is fine, smooth is not.
Taste It: Flavor Clues Are Data Too
Texture tells one story, but flavor tells another. Don't skip this step, even when the bake looks obviously wrong.
Metallic or soapy aftertaste: Too much baking soda or baking powder. Both leave a chemical residue when used in excess, and baking soda in particular can taste soapy if it's not fully neutralized by an acid in the recipe. Double-check your measurements — and make sure you're leveling off dry measuring spoons, not scooping.
Bland, flat flavor in a yeasted bread: Either the dough didn't ferment long enough, or it was made with too little salt. Fermentation develops flavor compounds that can't be rushed. A slow, cold ferment in the refrigerator overnight produces noticeably more complex bread than a quick same-day rise.
Overly sweet with a slightly burnt edge: This often points to too much sugar combined with high oven heat. Sugar caramelizes and burns at lower temperatures than most bakers realize. If your recipe is heavy on sugar, dropping the oven temperature by 25°F and extending the bake time can prevent over-browning.
Build a Diagnostic Habit
The key to getting useful information from a failed bake is to resist the urge to immediately change multiple things at once. If your bread was dense AND gummy AND had a pale crust, and you change your proofing time, your oven temperature, AND your hydration all at once, you won't know which fix actually worked.
Change one variable per bake. Write down what you changed and what happened. It feels slow, but it builds genuine understanding instead of accidental success.
Also worth doing: photograph your bakes before and after cutting. A side-by-side visual record of several attempts at the same recipe makes patterns obvious in a way that memory alone doesn't.
The Bake Isn't the Failure — The Guessing Is
Every baker has a drawer full of near-misses. The difference between a baker who improves quickly and one who stays stuck isn't talent — it's method. When you approach a bad bake as a source of information rather than a source of shame, the whole experience shifts.
Your sunken cake is trying to tell you something. Your gummy loaf has a very specific message. Learn the language, and you'll stop starting over from scratch — and start building real skill instead.